Mastering Jiggle Physics and Custom Sliders in Unreal Engine: A Comprehensive Guide for Game Developers
Jiggle physics is a term that can spark excitement, curiosity, or even skepticism among game developers and players alike. Regardless of how you feel about it, one thing is undeniable: implementing jiggle physics can add an extra layer of realism and immersion to your game. In this comprehensive guide, we'll walk you through the process of incorporating jiggle physics and custom sliders in Unreal Engine, using a free character from the Unreal Marketplace.
You can check out the video guide or follow along the text guide
Getting Started: Setting up Your Project
To begin, create a new blank project in Unreal Engine and give it an appropriate name. Import your chosen character – in our example, we'll be using Shinbi from Paragon. Make sure the character's skeletal structure includes breast bones, as this is essential for our jiggle physics implementation.
Create a basic map and place your character within it, ensuring that the "auto possess" value is set to "Player 0."

If the cloth physics of your character appear to be malfunctioning, you'll need to adjust the collision settings of the cloth asset within the skeletal mesh asset.

Preparing the Character: Input Settings and Physics Assets
Before diving into the jiggle physics, it's essential to set up your character's input settings correctly. To do this, head to the "Project Settings" and navigate to the "Input" section. Add the missing "axis mappings" for character movement and camera control, as well as the "Action Mapping" for jumping.

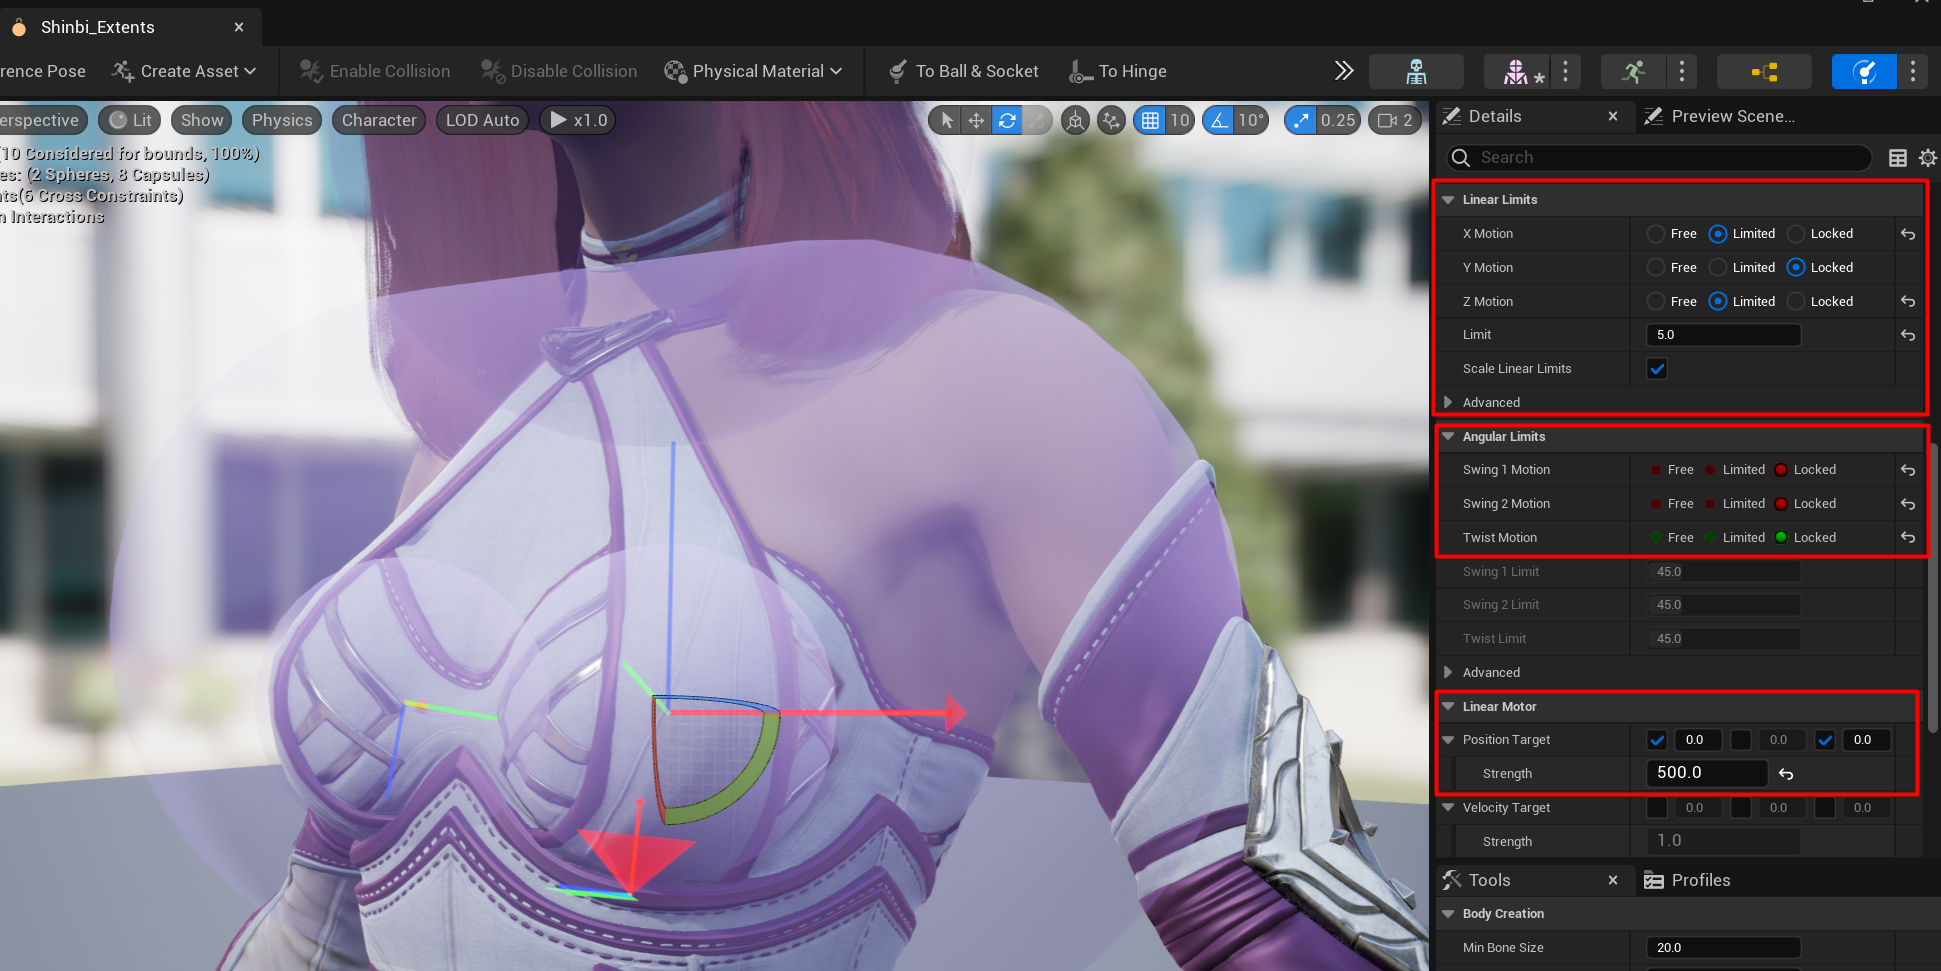
Next, open your character's physics asset and add a sphere body to the breast bone. Adjust the size and location of the sphere body, either manually or through the details panel.

Select the constraint, lock the angular limits and set the linear limits for the X and Z motion to "Limited," with a "Limit" value of 5. Adjust the Position Target linear motor to affect the X and Z axis, setting the strength to 500. Be sure to save your work frequently, as this step can be prone to crashes.
Implementing Jiggle Physics: Animation Blueprints and Rigid Body Nodes
With your physics asset configured, it's time to enable physics for the new bodies. Open your character's animation blueprint and add a "Rigid Body" node in the animation graph. Connect it after the Leg IK node, set the physics asset to the one you modified earlier, and change the "Component Linear Acceleration and Velocity Scale" values to 0.5.

Save, compile, and test your game to ensure that the jiggle physics are working correctly. If you encounter any issues, you may need to delete and recreate the right breast body in the physics asset.
Creating Custom Sliders: Control Rig and User Interface
Now that your jiggle physics are functioning, let's create a custom slider to control the size of your character's body parts. To achieve this, we'll use Control Rig in Unreal Engine. Create a Control Rig for your character by right-clicking on the Skeletal Mesh and selecting Control Rig. Within the Control Rig, set up the breast bones to have their scale adjusted by a float variable called "Breast Scale," with a default value of 1.

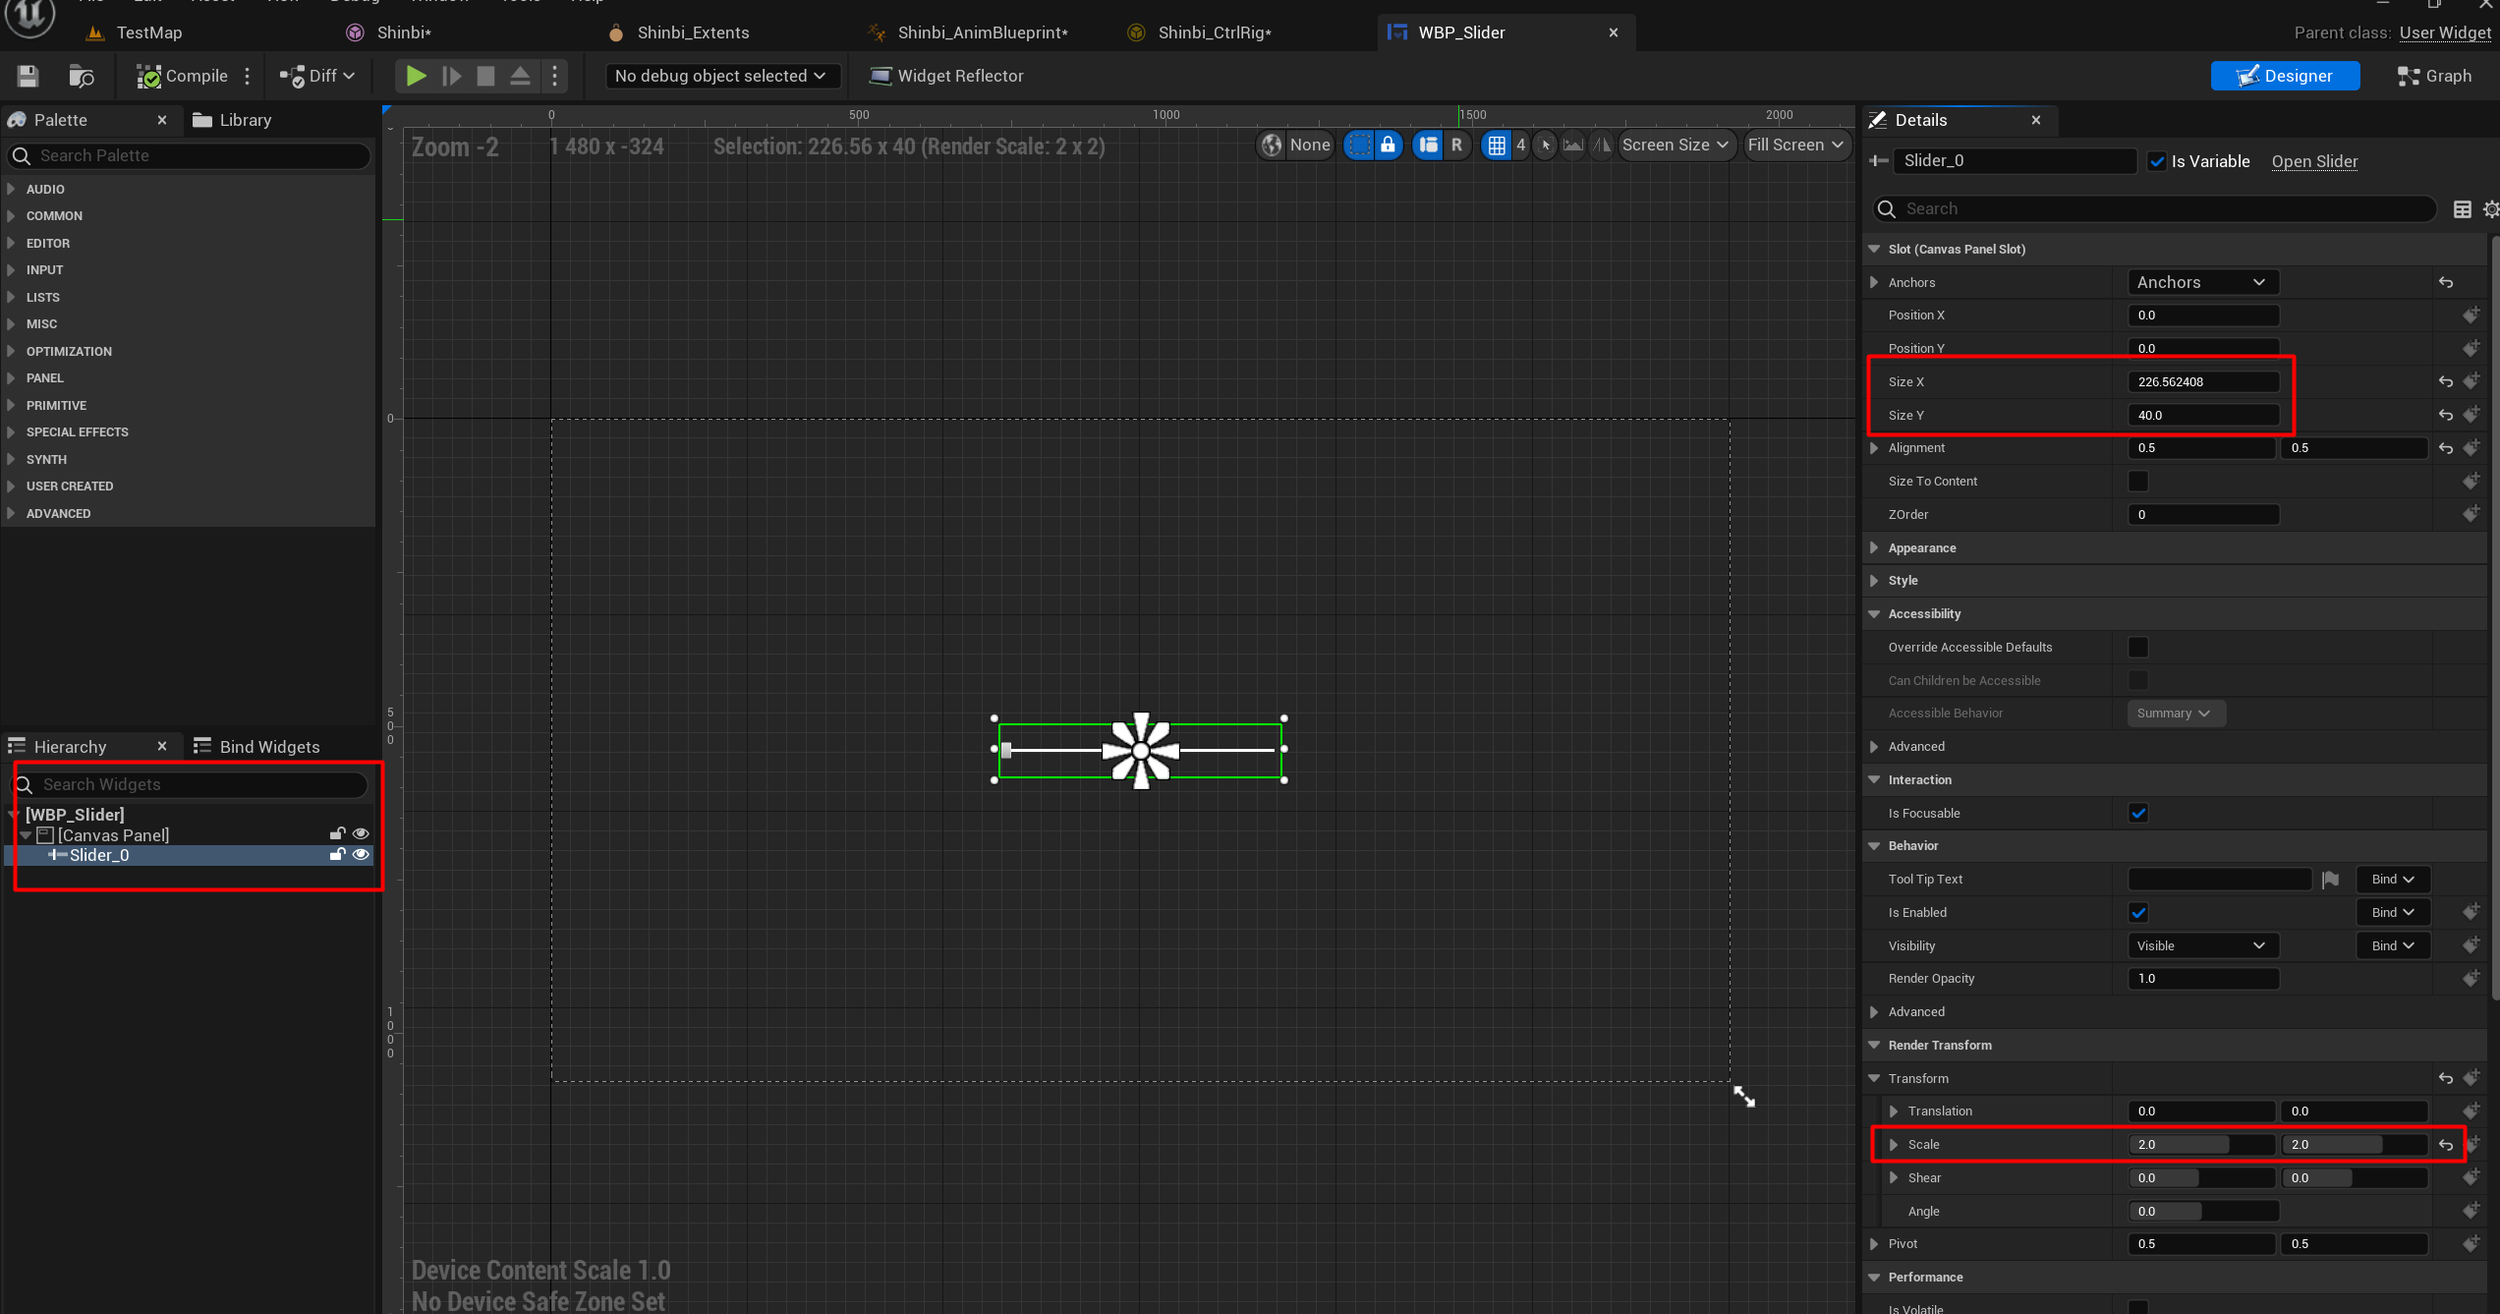
To create the user interface for your custom slider, design a widget blueprint containing a "canvas panel" and a "slider." Adjust the anchors and size of the slider for better visibility.
In your character blueprint, set up a debug input for quick testing and connect it to your slider widget. This will allow you to create and remove the slider widget as needed during gameplay. Ensure that your input mode is set to UI and game, allowing for seamless transitions between controlling the character and adjusting the slider.
Connecting the Custom Slider to the Animation Blueprint
To connect your custom slider to the animation blueprint, first, select the slider in the widget blueprint and create an "On Value Changed" event. Create a variable that will hold the character, which in turn contains the mesh and the animation blueprint. Through the Anim Instance, you can access and modify the information you need.
After setting up the character variable, update the animation blueprint to use the new "Breast Alpha" value. By remapping the values, you can create an Alpha value ranging from 0 to 1, controlling the scale of the character's body parts. Set the default value to zero, and ensure that everything is functioning correctly within the animation blueprint.


Finalizing the User Interface and Testing
With the slider connected to the animation blueprint, it's time to refine the user interface. If you find that the slider resets to its starting value upon reopening, you can override the function in the widget blueprint and retrieve the value from the animation blueprint to maintain consistency.
Once you have made any final adjustments, test your game thoroughly to ensure that both the jiggle physics and custom slider are working as intended.
Conclusion
Congratulations! You have successfully implemented jiggle physics and a custom slider in Unreal Engine. This knowledge can be applied not only to breast physics but also to other types of physical body simulations, such as hair, chains, and cloth. By mastering these techniques, you can create more engaging and immersive game experiences for your players.
Remember, practice makes perfect, and experimenting with different settings and configurations can yield even better results. So, keep learning, have fun, and continue to develop your game development skills. Be sure to share this guide with fellow developers and leave us a comment with your thoughts or any questions you may have. Happy developing!